command-grpc
注意事项
- 适用于
debian / ubuntu系统 - 请切换至
root权限账户执行
教程说明
此教程用于说明如何在 linux 系统上使用 grpc 协议节点
手动配置
更新并安装软件
apt-get -y update
apt-get -y install build-essential wget curl unzip
安装 xray 客户端
wget https://region-hk-download.ne.world/new/linux/v2ray/install-xray-release.sh
bash install-xray-release.sh
正常的输出的末尾几行应该是
info: Xray v1.8.4 is installed.
You may need to execute a command to remove dependent software: apt purge curl unzip
Created symlink /etc/systemd/system/multi-user.target.wants/xray.service → /etc/systemd/system/xray.service.
info: Enable and start the Xray service
安装 proxychains-ng
wget https://region-hk-download.ne.world/new/linux/v2ray/v4.14.zip
unzip v4.14.zip
cd proxychains-ng-4.14
./configure
make && make install
cp ./src/proxychains.conf /etc/proxychains.conf
cd ../
rm -rf v4.14.zip proxychains-ng-4.14
编辑 /etc/proxychains.conf ,将最后一行的
socks4 127.0.0.1 9050
改为
socks5 127.0.0.1 1081
编辑文件 /usr/local/etc/xray/config.json ,替换为(页面右上可以点击复制)
{
    "policy": {
        "system": {
            "statsOutboundUplink": true,
            "statsOutboundDownlink": true
        }
    },
    "log": {
        "access": "",
        "error": "",
        "loglevel": "warning"
    },
    "inbounds": [{
            "tag": "socks",
            "port": 1081,
            "listen": "127.0.0.1",
            "protocol": "socks",
            "sniffing": {
                "enabled": true,
                "destOverride": ["http", "tls"]
            },
            "settings": {
                "auth": "noauth",
                "udp": true,
                "allowTransparent": false
            }
        },
        {
            "tag": "http",
            "port": 10809,
            "listen": "127.0.0.1",
            "protocol": "http",
            "sniffing": {
                "enabled": true,
                "destOverride": ["http", "tls"]
            },
            "settings": {
                "auth": "noauth",
                "udp": true,
                "allowTransparent": false
            }
        },
        {
            "tag": "api",
            "port": 4601,
            "listen": "127.0.0.1",
            "protocol": "dokodemo-door",
            "settings": {
                "udp": false,
                "address": "127.0.0.1",
                "allowTransparent": false
            }
        }
    ],
    "outbounds": [{
            "tag": "proxy",
            "protocol": "trojan",
            "settings": {
                "servers": [{
                    "address": "",
                    "method": "chacha20",
                    "ota": false,
                    "password": "",
                    "port": 453,
                    "level": 1,
                    "flow": ""
                }]
            },
            "streamSettings": {
                "network": "grpc",
                "security": "tls",
                "tlsSettings": {
                    "allowInsecure": false,
                    "serverName": ""
                },
                "grpcSettings": {
                    "serviceName": "mygrpc",
                    "multiMode": false
                }
            },
            "mux": {
                "enabled": false,
                "concurrency": -1
            }
        },
        {
            "tag": "direct",
            "protocol": "freedom",
            "settings": {}
        },
        {
            "tag": "block",
            "protocol": "blackhole",
            "settings": {
                "response": {
                    "type": "http"
                }
            }
        }
    ]
}
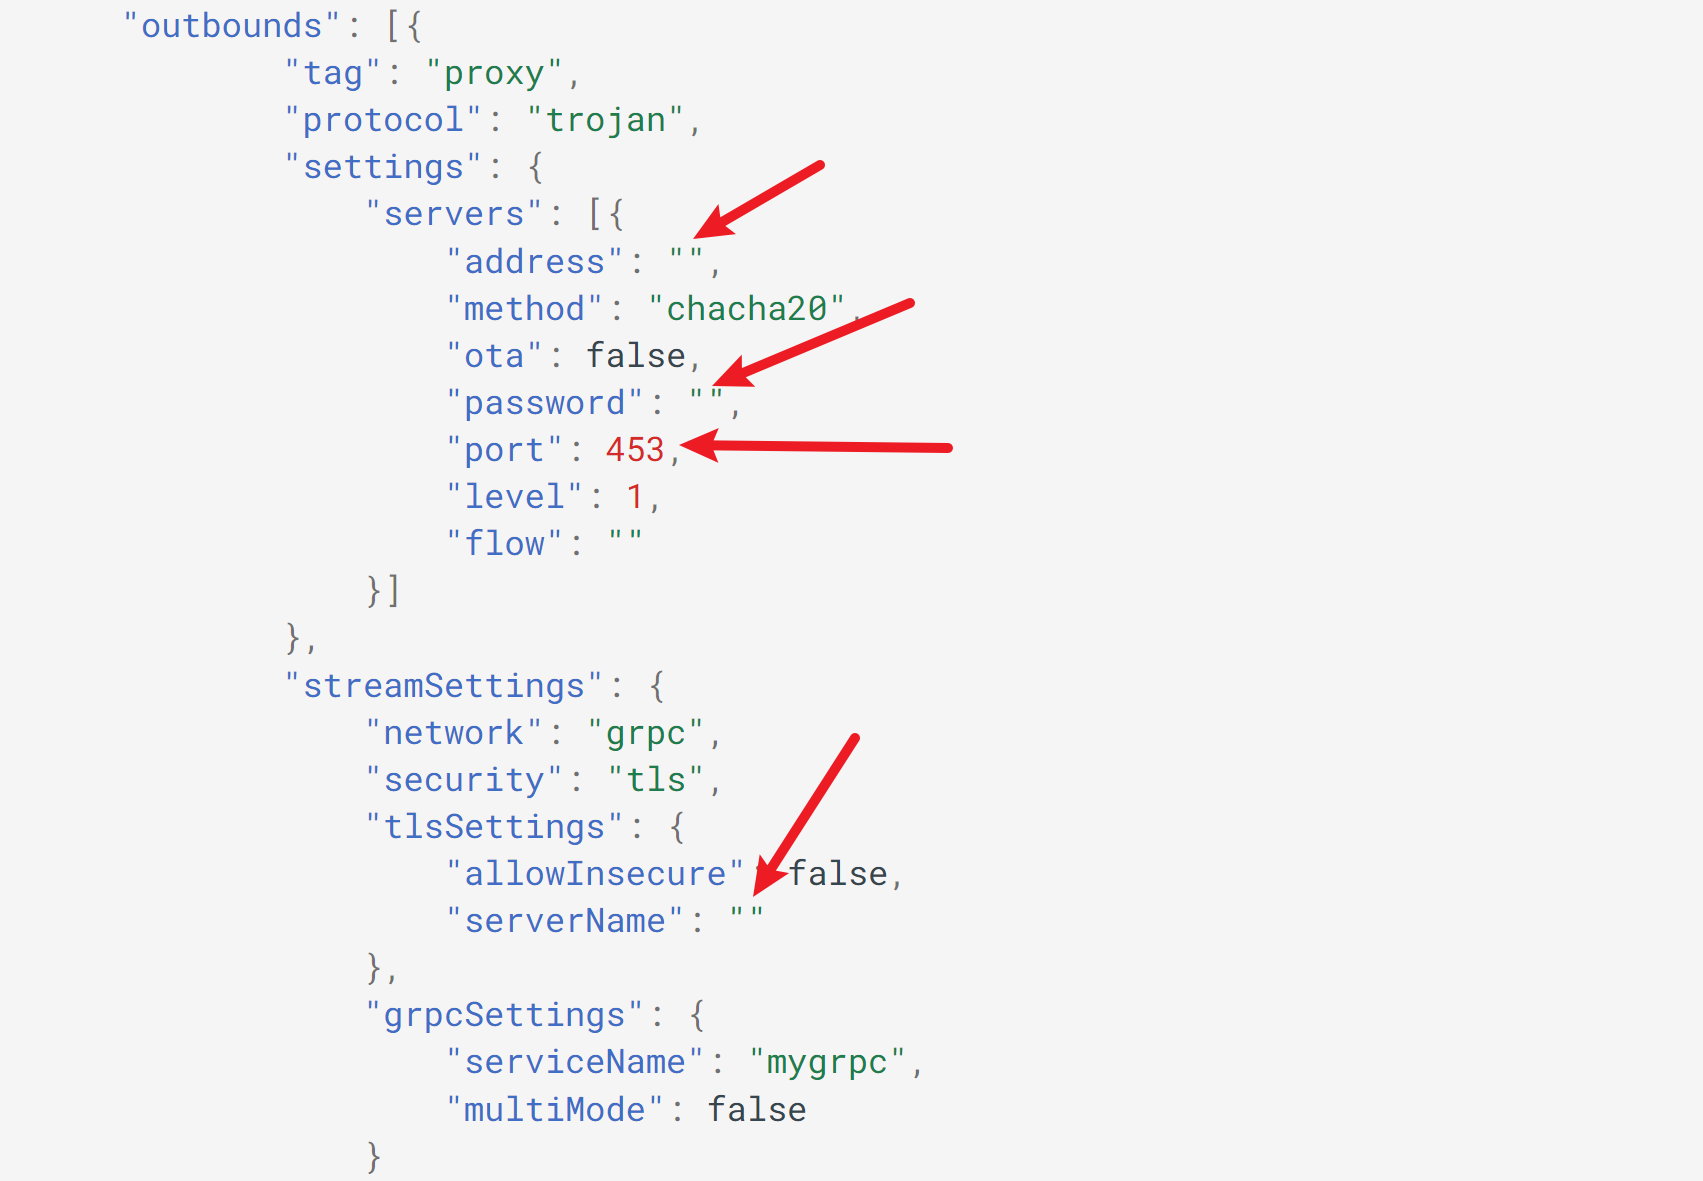
需要修改以下四个地方

需要修改的这些信息可以先访问节点列表:https://neworld.cloud/user/server
然后找到标有 GRPC 的节点,点击复制按钮

会得到以下内容
trojan://b0d7d2cb-3dc7-408f-85c3-dffcf26e0594@relay.jpa.nwncd.com:610?peer=jpa08.nwncd.com&sni=jpa08.nwncd.com&obfs=grpc&path=mygrpc&obfsParam=jpa08.nwncd.com&type=grpc&security=tls&serviceName=mygrpc#Japan%20A08
注意
实际操作时,点击复制按钮后,复制的文本可能会有多行,每一行都是不同的链接配置。选择其中的一行应用即可
注意
以下内容仅以上面内容为例做演示,实际操作时需要以复制的内容为准,按实际情况修改配置 json 文件
address填在双引号内relay.jpa.nwncd.comport填在英文分号前610password填在双引号内b0d7d2cb-3dc7-408f-85c3-dffcf26e0594serverName填在双引号内jpa08.nwncd.com(sni=xxx) 这里的内容
然后保存修改的配置文件
然后打开终端,执行以下命令。以下命令会添加为开机启动,并启动 xray 服务
systemctl enable xray
systemctl start xray
可以使用以下命令查看运行日志
systemctl status xray
如何使用
在需要代理的命令前加上 proxychains4 即可
如果你要执行的命令或程序有配置 socks5 代理的地方,则地址填 127.0.0.1,端口填 1081
root@Vdebian:~# curl ipv4.ip.sb
当前 IP:106.54.217.190 来自于:中国 上海 上海 电信/联通/移动
root@Vdebian:~# proxychains4 curl myip.ipip.net
当前 IP:38.147.160.32 来自于:美国 加利福尼亚州 洛杉矶 cogentco.com
故障排查
- 确认账户未到期
- 确认账户有流量
- 确认配置的节点信息无误
- 确认配置的节点在节点列表中有人在使用
- 尝试修改配置更换其他节点(修改完成后请重启客户端)
重启客户端命令
systemctl restart xray
设置 git 代理
设置
git config --global http.proxy 'socks5://127.0.0.1:1081'
git config --global https.proxy 'socks5://127.0.0.1:1081'
取消设置
git config --global --unset http.proxy
git config --global --unset https.proxy